Overview
Think of Spaces as your blank canvas for AI collaboration—they’re where endless possibilities begin. Whether you’re working solo on a personal project or collaborating with your team, Spaces help you organize your AI-powered work in a way that makes sense for you. Creating a Space is like starting a new project, team workspace, or initiative. Each Space provides an isolated environment where you can customize everything from your AI assistants to your team members, keeping your work organized and focused.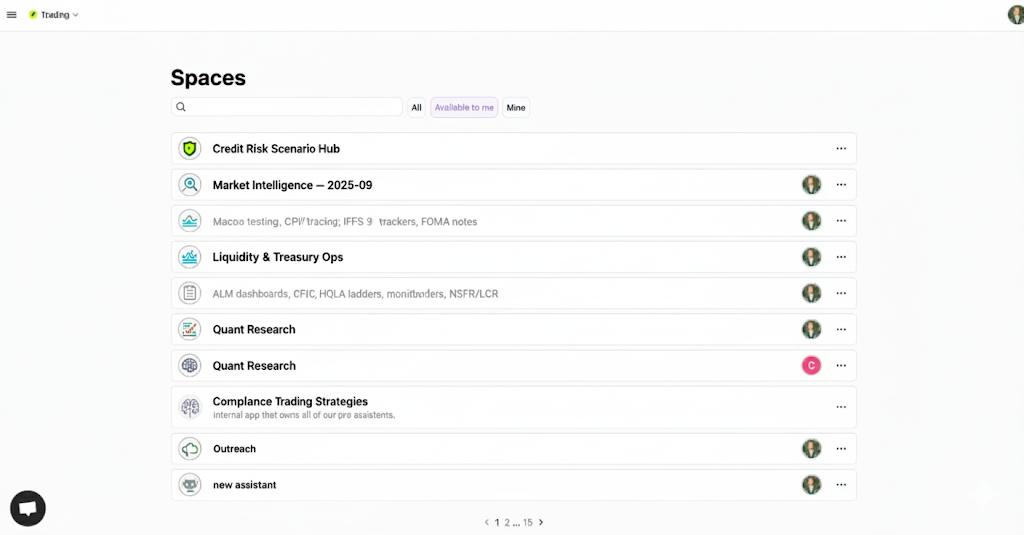
Viewing Your Spaces
Your Spaces page gives you a clear overview of all your AI workspaces. At the top, you’ll find:- A search bar to quickly find any space by name
- Filter tabs to view “All” spaces, only those “Available to me”, or just “Mine”
- The + New Space button to create a new workspace
Creating a New Space
- Click the ”+ New Space” button at the top of your Spaces page
-
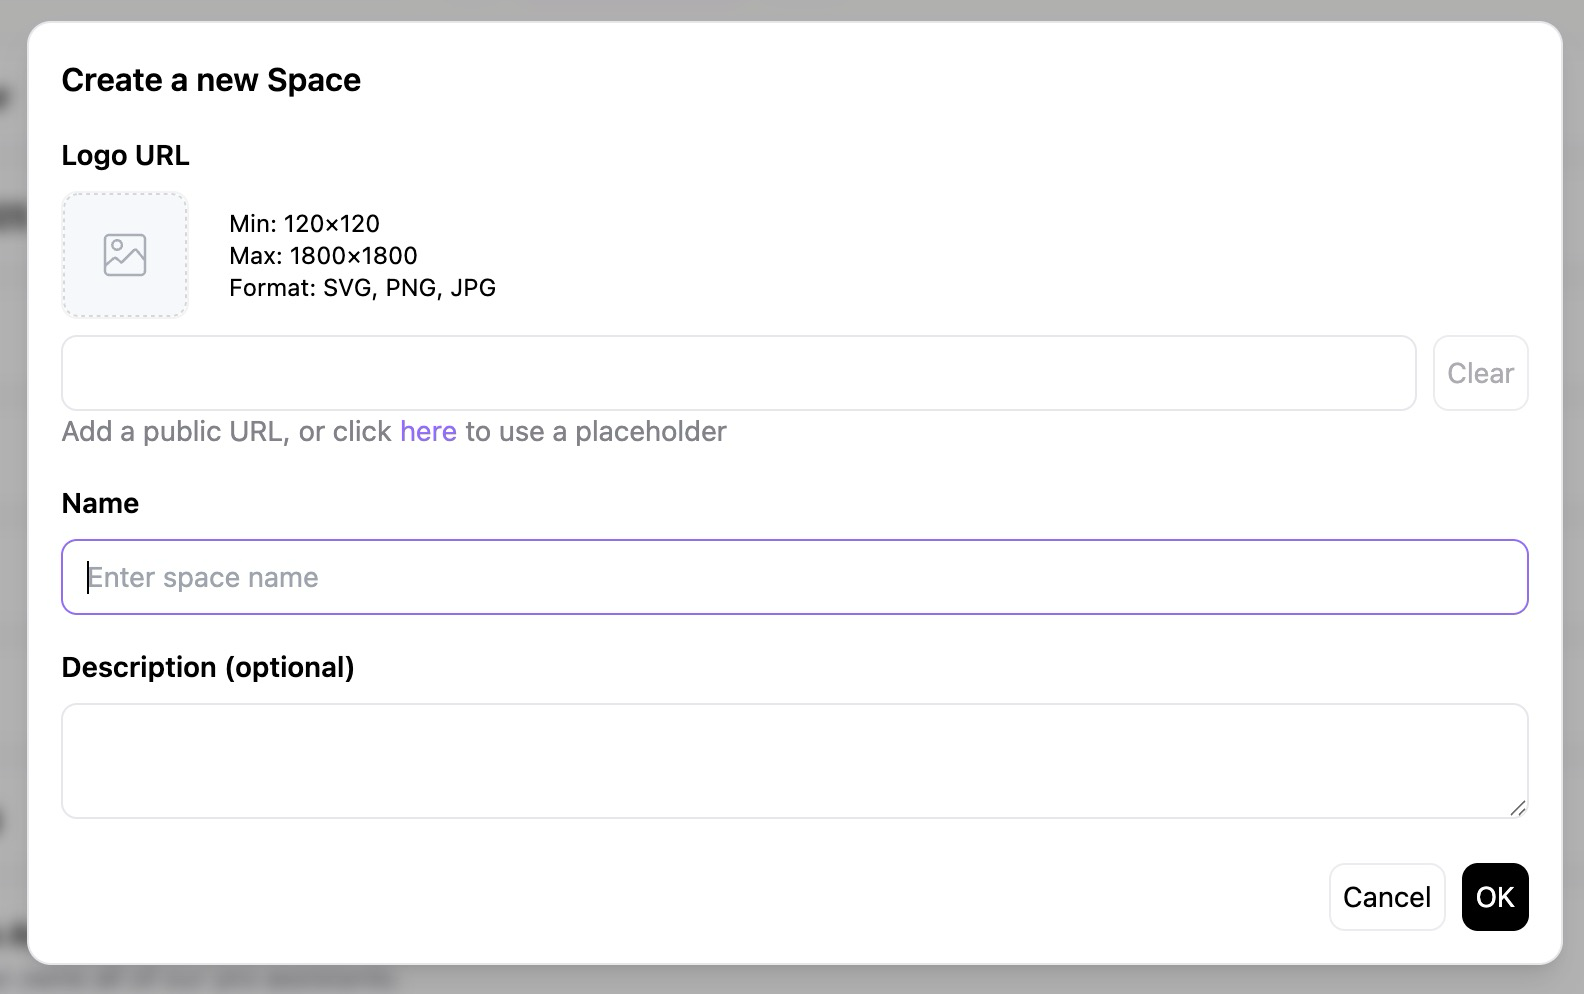
Fill in your Space details:
- Logo URL (optional) - Add a custom logo to visually identify your space
- Minimum size: 120×120 pixels
- Maximum size: 1800×1800 pixels
- Supported formats: SVG, PNG, JPG
- Name (required) - Give your space a clear, descriptive name
- Description (optional) - Add context about the space’s purpose
- Logo URL (optional) - Add a custom logo to visually identify your space
- Click “OK” to create your space
After Creating Your Space
Your Space starts as a blank canvas. As you add conversations and data, it becomes your personalized AI workspace organized around your topics and projects. Next steps:- Choose an assistant (or create one)
- Upload data and documents
- Set up tasks
- Invite team members
- Connect integrations
Space Management
Editing Spaces
To modify a space:- Click the menu icon (⋮) next to the space name
- Select “Edit”
- Update space settings:
- Name
- Logo
- Description
- Visibility settings
- Save changes
Deleting Spaces
To delete a space:- Click the menu icon (⋮) next to the space name
- Select “Delete”
- Confirm deletion in the dialog
- The space and all its contents are permanently removed
Space Actions
From the space list, you can:- Open space - Click the space card to enter
- Edit - Modify space settings
- Delete - Remove the space
Space Settings
When inside a space, you can see the “Your space” panel on the right with:-
Default Assistant - Currently selected assistant
- Shows assistant name and avatar
- “Create a new assistant” button
-
Default Model & Router - Currently selected model
- Dropdown to select different models
- Shows current model name with checkmark
-
Members - Team members with access
- Click + to add members
- Shows member count
-
Documents - Space-specific documents
- Click + to create new documents
- Shows document count or “No results”
-
Data - Uploaded files and data
- Click + to add data
- Options: Upload, Add web page, Connect data source
- Shows data count or “No results”
-
Tasks - Scheduled automated tasks
- Click + to create tasks
- Shows task count or “No tasks scheduled yet”
-
Learned Logs - Training data from conversations
- Search functionality
- Shows “No learned logs yet” when empty
-
Integrations - Connected external services
- AI Chatbot
- Chrome Extension
- Make.com Integration
- Zapier Integration
- “Request a new integration” link
Search and Filtering
Search Functionality
Find spaces by:- Space name
- Real-time results as you type
- Clear search with X button
Filter Tabs
All - Complete list of spaces- Shows every space in the organization
- Useful for admins and space discovery
- Spaces you’re a member of
- Spaces you have permissions to view
- Spaces you created
- Spaces where you’re the owner
Best Practices
Permission Levels
Each space has permission levels:- Owner - Full control over space
- Admin - Manage settings and members
- Editor - Create and edit content
- Viewer - Read-only access
Common Use Cases
Team Collaboration
- Create team-specific spaces
- Share assistants and data
- Centralize conversations
Project Management
- Organize by project or initiative
- Track progress through conversations
- Store project-related documents
Client Work
- Separate space per client
- Client-specific assistants and data
- Controlled access for stakeholders
Testing & Development
- Sandbox spaces for experiments
- Test new assistants and models
- Safe environment for trials
Troubleshooting
Can’t Create Space
If you can’t create a space:- Check organization subscription limits
- Verify you have creation permissions
- Ensure name doesn’t conflict with existing space
Space Not Appearing
If a space doesn’t show:- Check which filter tab is selected
- Verify you have access permissions
- Try searching for the space name
- Confirm space hasn’t been deleted
Lost Access
If you lost access to a space:- Contact the space owner or admin
- Check if your organization membership changed
Space Overview
Learn about Spaces
Members
Manage Space Members
Assistants
Configure Default Assistant
Models & Routers
Set Default Models