Overview
The chat interface is where you interact with AI models in real-time. It provides a rich set of features for conducting conversations, managing context, and collaborating with team members.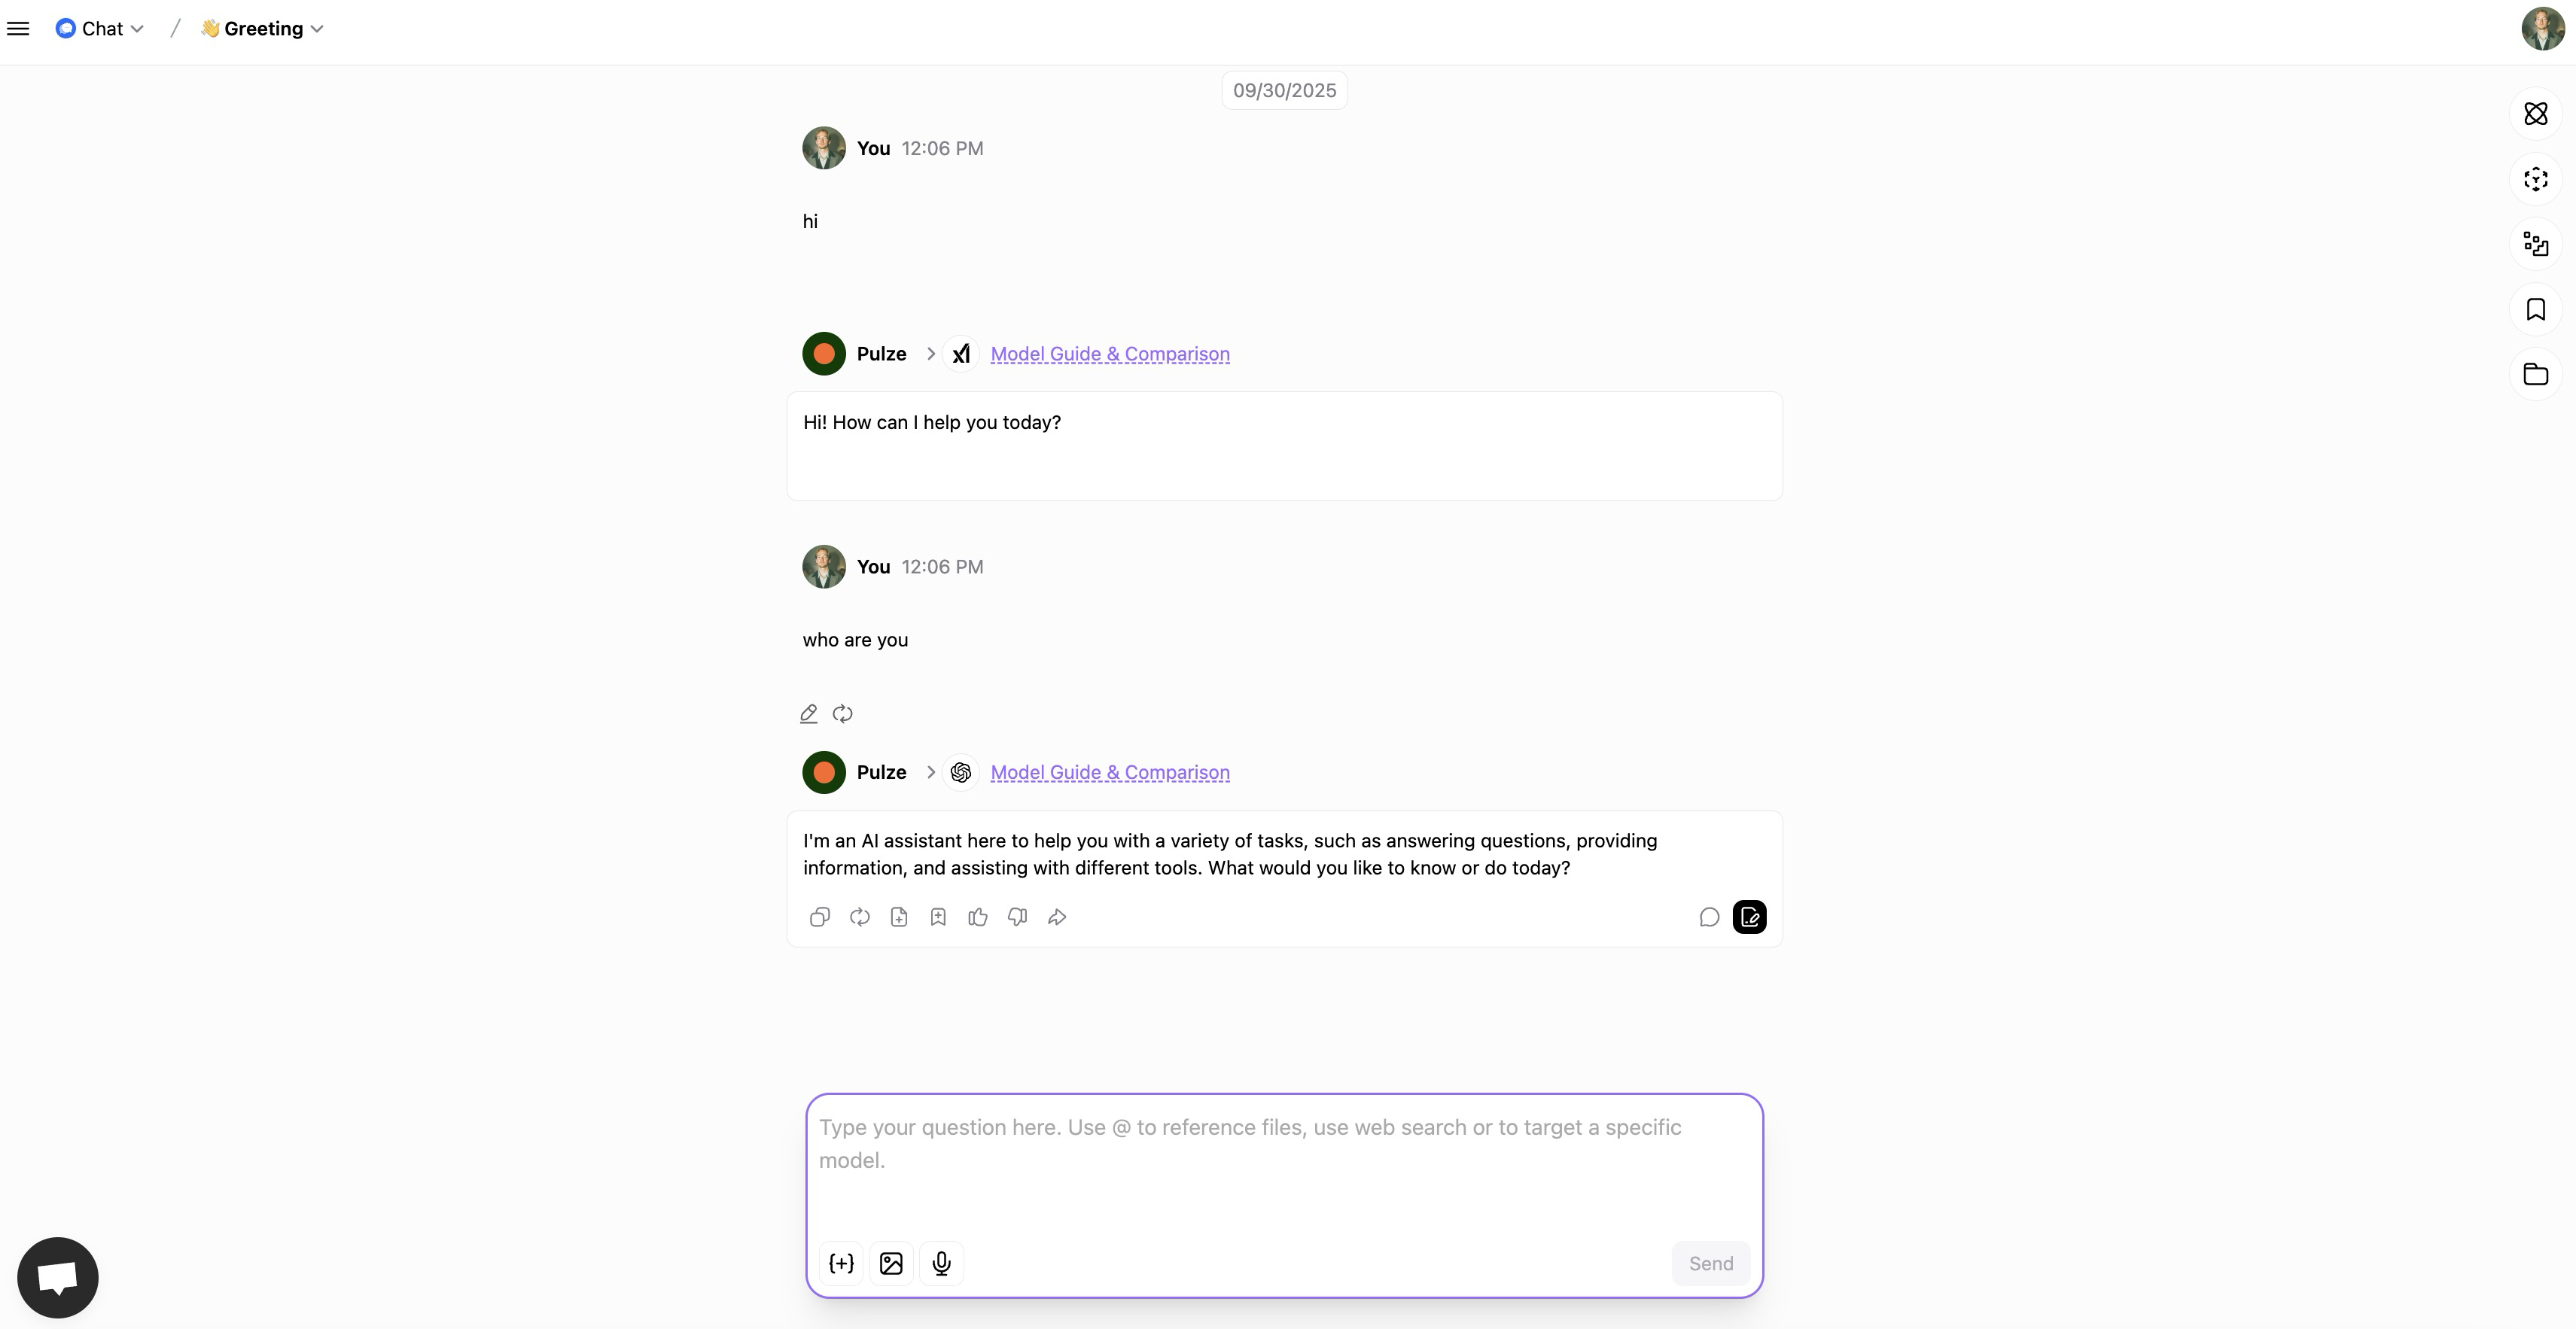
Interface Layout
The Input Area
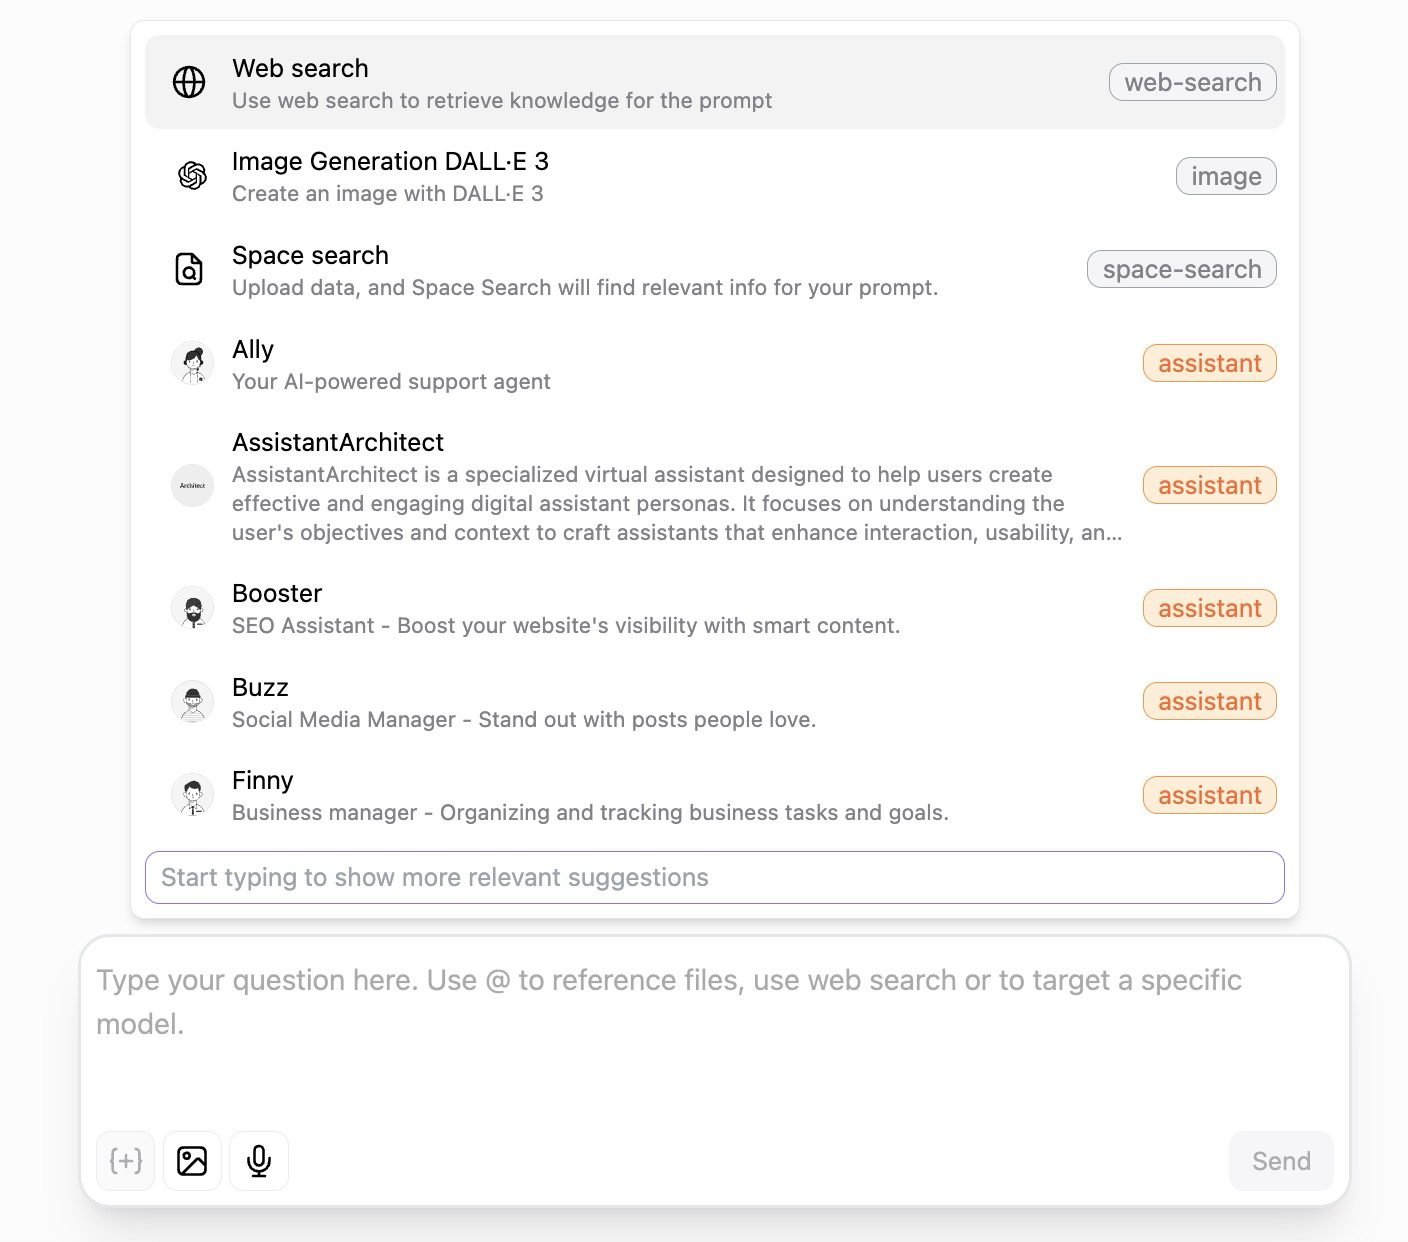
The input area is your command center for interacting with AI. It’s located at the bottom of the screen and packed with intelligent features to make your conversations more productive. Smart Suggestions Dropdown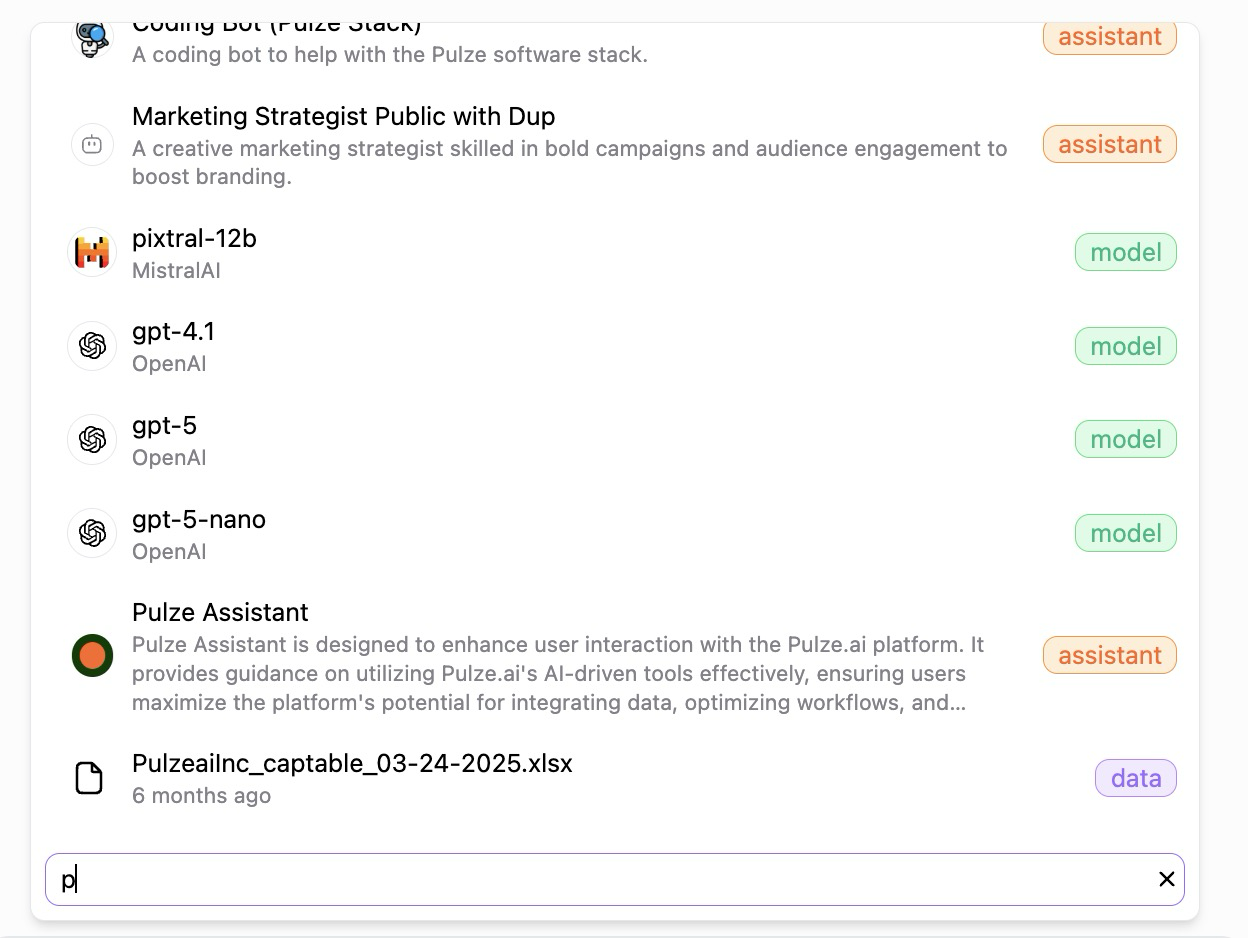
@ symbol, a helpful dropdown appears above your input showing relevant suggestions. This intelligent menu adapts to what you’re typing and offers:
- Web Search - Trigger real-time web searches to get current information for your prompt. Perfect when you need facts, news, or up-to-date data.
- Image Generation - Quickly access image generation tools like DALL-E 3 to create visuals based on your descriptions.
- Space Search - Upload data to your space, and Space Search will automatically find relevant information from your documents to enhance your prompt with the right context.
- Quick Assistant Access - Browse and switch between assistants on the fly. See options like Ally (your support agent), Booster (SEO assistant), Buzz (social media manager), Finny (business manager), and more. Each shows a brief description so you know exactly what they’re designed to help with.
- Start typing to see more relevant suggestions appear dynamically based on your input.
- Type naturally—the field expands as you write longer messages
- Use
@to reference files from your space, making it easy to give the AI context from your uploaded documents - Trigger web search capabilities to pull in fresh information
- Target specific models directly from your input
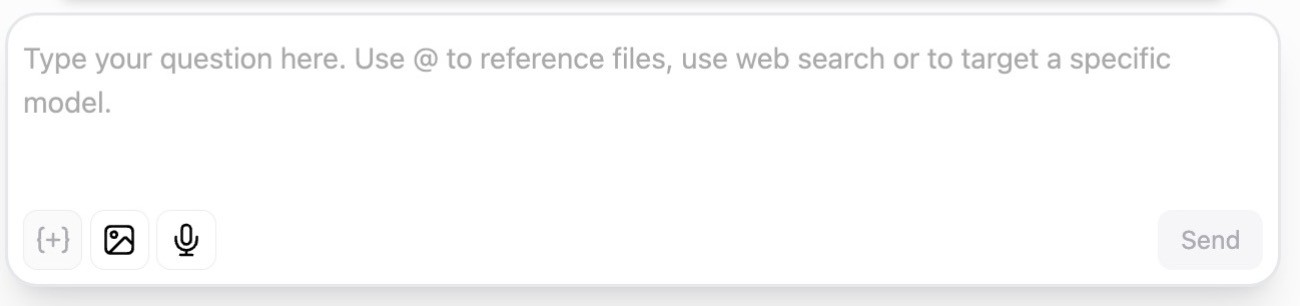
- The placeholder text guides you: “Type your question here. Use @ to reference files, use web search or to target a specific model.”
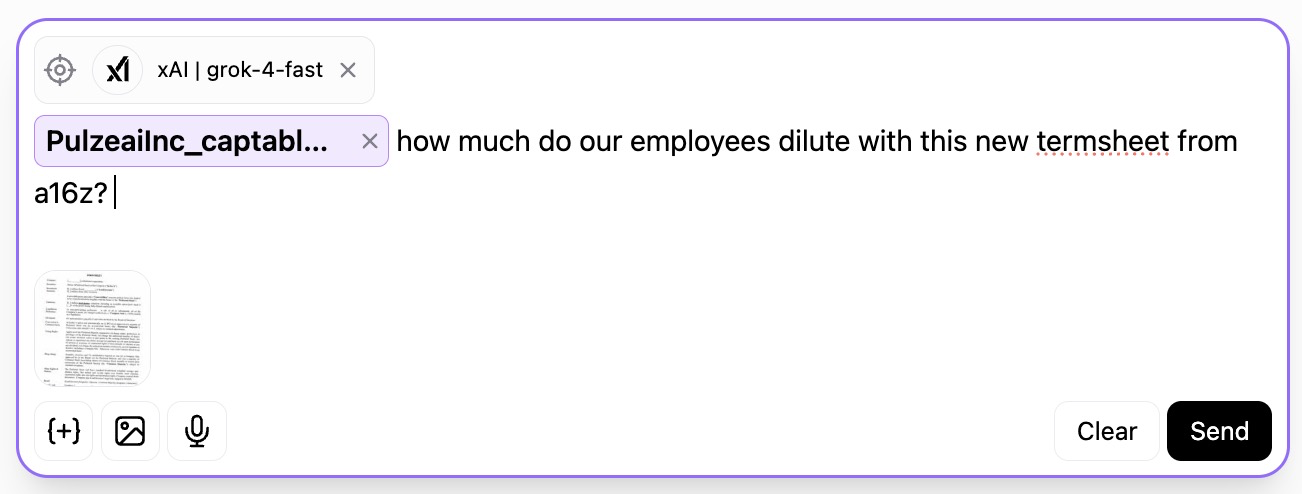
- Attachment button (+) - Upload files, documents, images, or data to include with your message
- Image button (picture icon) - Add images directly to your conversation for visual context
- Voice input button (microphone icon) - Speak instead of type—perfect for hands-free interaction or when you want to explain something quickly
Main Chat Area
The central conversation view is where your dialogue unfolds naturally. Messages flow chronologically with clear visual separation between you and the AI. Each of your messages shows your profile picture and timestamp, while AI responses display the assistant’s avatar and which model generated the response. When the AI uses tools or references sources, you’ll see clear indicators showing what data was accessed. Responses appear in real-time as they’re generated, giving you immediate feedback. Below each AI message, you’ll find action buttons to copy the response, add it to a document, create a task, bookmark it for later, give feedback, or explore more options.Right Sidebar Panels
The right side of the interface houses powerful panels that slide out when you need them. These give you complete control over your conversation’s behavior and help you build your personal AI workspace. Click any icon in the top-right to reveal its panel:- Assistant Panel (robot icon) - Your gateway to AI personalities and capabilities
- Models Panel (microchip icon) - Fine-tune which AI models are available
- Data Panel (folder icon) - Manage your space’s knowledge base
- Collections Panel (bookmark icon) - Your saved responses and personal knowledge library
- Share Panel (share icon) - Collaborate with team members
- Comments Panel (comment icon) - Add discussions and notes
Starting a Conversation
1
Navigate to Space
Open your space from the Spaces menu
2
Click Input Area
Click the “Start a new conversation” text field
3
Enter Your Prompt
Type your message or question
4
Submit
Press Enter (or Cmd/Ctrl+Enter) or click Send
Message Composition
Text Input
- Multi-line: Press Shift+Enter for new lines
- Formatting: Supports Markdown formatting
- Mentions: Tag team members with @username
- Commands: Use slash commands for quick actions
File Attachments
Attach files to provide context:- Documents: PDF, DOCX, TXT, etc.
- Images: JPG, PNG, GIF, etc.
- Data Files: CSV, JSON, XML, etc.
- Code Files: Various programming languages
- Click attachment icon or drag-and-drop
- Select files from your computer
- Wait for upload completion
- Files appear as chips below input
- Submit message with attachments
Code Blocks
Format code properly:Message Features
Message Actions
Each message has action buttons:- Copy: Copy message content
- Edit: Modify your own messages
- Delete: Remove messages
- Share: Share specific messages
- React: Add emoji reactions
- Comment: Add threaded comments
- Save: Add to collections
Regenerate Responses
If you’re not satisfied with a response:- Click the regenerate button
- The AI generates a new response
- Compare different variations
- Choose the best version
Edit and Resend
Modify your prompts:- Click edit on your message
- Make changes
- Resubmit to get new response
- Previous responses remain in history
AI Response Features
Streaming Responses
Responses appear in real-time:- Progressive Display: See text as it’s generated
- Stop Generation: Cancel mid-response
- Smooth Experience: Natural typing effect
Tool Call Display
When AI uses tools:- Tool Name: What tool is being used
- Parameters: What data is being queried
- Results: Output from the tool
- Success/Failure: Tool execution status
References & Sources
AI responses can include:- Source Citations: Links to referenced material
- Data Sources: Which files were consulted
- Web Links: External resources used
- Confidence Indicators: Reliability signals
Context Management
Conversation Context
The AI maintains context throughout:- Previous Messages: Entire conversation history
- Attached Files: Uploaded documents
- Space Data: Relevant space information
- User Preferences: Your settings
Context Window
Understanding token limits:- Each model has a maximum context size
- Older messages may be truncated
- Important context is prioritized
- Use summaries for long conversations
Clearing Context
Start fresh when needed:- Begin a new conversation
- Explicitly state “ignore previous context”
- Use a different conversation thread
Sidebar Panels
Models Panel
Click the microchip icon to open the Models panel: Header- Title: “Models”
- Tip: “You have full control over which models are available for use in your space. Select or deselect models to tailor your options, ensuring that only your preferred models are ready for generating responses.”
- Checkboxes - Select/deselect models
- Provider Icons - Visual identification (AI21, Anthropic, Google, OpenAI, etc.)
- Model Names - Full model identifiers with versions
- Checked models - Currently selected, indicated with blue checkmark
- Scrollable - Long list of available models
- Close button (X) - Hide panel
- Click microchip icon to open
- Browse available models
- Check/uncheck models to customize selection
- Selected models become available in conversations
- Close panel when done
Assistant Panel
Click the robot icon to open the Assistant panel: Empty State (No Assistant Selected):- Icon display area with gear/sparkle icon
- Message: “No Assistant selected”
- Sub-message: “Choose or create an assistant to personalize your experience”
- Search bar: “Search for an assistant”
- ”+ Create Assistant” button - Quick assistant creation
- Provider icon
- Model name
- Info icon (i) - View model details
- Click to switch to that model
- Grouped by provider
- Provider icons and names
- Full model list
- Search functionality
Data Panel
Click the folder icon to open the Data panel: Header:- Title: “Data”
- Tip: “Utilize labels to categorize related files and effortlessly reference them in your threads using @-refs”
- Search bar: “Search all files”
- Refresh icon - Reload file list
- ”+ Add” button - Upload new files
- “Labels” button - Manage file labels
- Drop zone: “Drop file(s) here” for drag-and-drop uploads
- File list (when files are present)
- File type icons
- File names
- Organization by labels
- Click + Add to upload files
- Drag and drop files into drop zone
- Search for specific files
- Use @-refs in messages to reference files
- Organize with labels
Collections Panel
Click the bookmark icon to open the Collections panel: Header:- Title: “Collections”
- Tip: “Find all your favorite messages in one place. Keep important notes handy by adding them to collections for quick access, and remove them when they’re no longer needed.”
- Search bar: “Search all collections”
- ”+” button - Create new collection
- Message: “No results.”
- Instructions to start adding messages
- Click bookmark icon on messages to save
- Organize saved messages into collections
- Search collections quickly
- Access important information easily
- Remove when no longer needed
Share Conversation
Click the share icon to open share dialog: Dialog Content:- Title: “Share Conversation”
- Sub-title: “Invite collaborators to join this discussion.”
- Label: “Members with access”
- Dropdown: “Select an organization member or type an email to invite”
- Add team members to conversation
- Grant conversation access
- Label: “Share this link:”
- URL field: Full conversation URL (copyable)
- Copy button - Copy link to clipboard
- Note: “This link only works for users who already have access to this Space.”
- Cancel - Close without changes
- Share - Confirm sharing
Model Switching
Mid-Conversation Switching
Change models without losing context:- Open Models panel (microchip icon)
- Check/uncheck models or use assistant panel suggestions
- Select different model from recommendations
- Continue conversation
- Context is preserved
Model Comparison
Compare model responses:- Ask same question with different models
- Use multiple conversations
- Check Assistant panel for suggestions
- Evaluate quality differences
- Choose best model for task
Keyboard Shortcuts
Speed up your workflow:Conversation Settings
Configure conversation behavior:General Settings
- Auto-save: Automatically save conversations
- Streaming: Enable/disable real-time responses
- Timestamps: Show/hide message times
- Notifications: Alert preferences
Input Settings
- Enter Key Behavior: Send or new line
- Auto-complete: Suggest completions
- Spell Check: Enable/disable
- Voice Input: Speech-to-text
Display Settings
- Theme: Light or dark mode
- Font Size: Adjust readability
- Message Density: Compact or comfortable
- Code Highlighting: Syntax theme
Accessibility Features
Screen Reader Support
- Semantic HTML for assistive technologies
- ARIA labels on interactive elements
- Keyboard navigation throughout interface
Visual Adjustments
- High Contrast: Improved visibility
- Font Scaling: Adjustable text size
- Color Themes: Various options
- Focus Indicators: Clear keyboard focus
Keyboard Navigation
- Tab through interactive elements
- Arrow keys for history navigation
- Escape to close panels
- Standard shortcuts throughout
Mobile Experience
The interface adapts for mobile:- Responsive Layout: Optimized for small screens
- Touch Gestures: Swipe to access panels
- Simplified UI: Essential features prioritized
- Voice Input: Easy on mobile
Best Practices
Clear Communication
Clear Communication
- Write clear, specific prompts
- Provide necessary context
- Break complex tasks into steps
- Ask follow-up questions
- Iterate on responses
Context Management
Context Management
- Attach relevant documents early
- Reference previous messages
- Start new conversations for new topics
- Summarize long conversations
- Use collections for important content
Collaboration
Collaboration
- Share conversations with team members
- Use comments for discussions
- Tag members when input needed
- Keep conversations organized
- Document decisions
Efficiency
Efficiency
- Use keyboard shortcuts
- Master model switching
- Leverage templates
- Save frequently used prompts
- Organize conversations well
Troubleshooting
Common Issues
Message Not Sending
Message Not Sending
Solutions:
- Check internet connection
- Verify you’re logged in
- Try refreshing the page
- Check message length limits
- Ensure files are uploaded
Slow Responses
Slow Responses
Solutions:
- Check model load status
- Try a faster model
- Reduce context length
- Check network speed
- Simplify your prompt
Context Lost
Context Lost
Solutions:
- Check conversation history
- Reattach necessary files
- Summarize previous context
- Start new conversation if needed
- Use explicit references
File Upload Fails
File Upload Fails
Solutions:
- Check file size limits
- Verify file format
- Try different file
- Check storage quota
- Contact support if persists
Next Steps
Message History
Learn about managing message history
References & Sources
Understand source tracking
Comments & Collaboration
Collaborate with your team
Back to Guide
Return to Pulze Guide